
|
|
Custom Navigation Buttons in Access 2.0by Dan Haught All rights reserved One of the more important aspects of an Access form's user interface are the navigation buttons that allow users to move through records. Access supplies this functionality through the NavigationButtons property of the form, offering you the ability to automatically have navigation buttons appear at the bottom of your of form. On the surface, the built-in navigation buttons serve their purpose, but are limited in that they are not customizable: you can turn them on or off, but you cannot control their behavior or appearance. They are also limited by the fact that they are always displayed at the bottom of the form. If your application's user-interface design requires a different location, you are out of luck.
Figure 1, Built-In Navigation Buttons Fortunately, with a little sleight of hand (and a few undocumented properties thrown in for good measure), you can easily design your own navigation buttons, and have complete control over their appearance, placement, and behavior. First, let's cover the basics. Access provides the GotoRecord for moving among the records in a form's underlying recordset. By supplying and argument to GotoRecord, you can move to the first, next, previous or last record, or to a specific record. By creating command buttons that call this action, you provide functionality for moving among records. This part is simple. Duplicating the other components of the navigation buttons is a bit more difficult, but this article will show you how. Creating the ButtonsThe first part of this technique involves creating Command Button controls on your form. Place four buttons, on each for MoveFirst, MovePrevious, Move Next and Move Last actions. In our example, we name the buttons cmdMoveFirst, cmdMovePrevious, cmdMoveNext and cmdMoveLast respectively. To duplicate the bitmaps that appear on the built-in navigation buttons, use the Builder button next to the Picture property on your Command Button's property sheet. You can select from the Go To ... bitmaps. Next, attach code to each of the buttons that initiates the appropriate action, as listed below:
Before moving on, it is important to note that the cmdMovePrevious and cmdMoveNext buttons use the On Error Resume Next statement. This is because the user will often try to move beyond the limits of the form's recordset. For example, if the form is on record one, and the user presses the cmdMovePrevious button, Access will generate a runtime error because moves before the first record are obviously not allowed. The On Error Resume Next handles this by telling Access to ignore the error. Getting the Record NumberOnce you have placed the buttons on the form and typed in the code, you have functional navigation buttons, but they are hardly exciting. The next technique involves displaying the current record number. As all seasoned Access developers know, the concept of the "record number" does not have a place in the relational world of set-oriented data. As such, Access does not surface a record number. Or does it? Microsoft Jet version 2.0, introduced with Microsoft Access 2.0, actually does surface the record number in the form of an undocumented Recordset property called AbsolutePosition. Armed with this tidbit, you can easily get the number of the record currently on the form. The following code shows how this is done:
This function works by first cloning the form's underlying recordset into a DAO Recordset object. The reason this is needed is that the AbsolutePosition property belongs to Recordset objects, not to form objects. By cloning the form's recordset, we are making a copy in the form of a DAO recordset with which we can look at the AbsolutePosition. The next step, setting the bookmark, synchronizes the new Recordset object with the form's underlying recordset. This is necessary because the act of cloning a form's recordset merely creates the recordset. It does not move the record pointer in the new recordset to where the form currently is in its recordset. You can also see that an On Error Resume Next is used just before the function retrieves the value of the bookmark property. If you attempt to retrieve the Bookmark property of a new record (a record that has been added but not yet committed to a table), a runtime error occurs. The function uses this behavior to return a value of -1 to let you know that you are on a new record. Finally, the function retrieves the value of the AbsolutePosition property, which it returns to its caller. To display this number, place a label in the vicinity of your navigation buttons (usually between the MovePrevious and MoveNext buttons) and assign its Caption property to the value returned by the lngGetRecNo() function. In our example, we use a label named lblNavRecord. To update this label as the user moves through the form's records, call the lngGetRecNo() function from the form's OnCurrent event. Be sure to check for a value of -1 to handle situations where a user moves to a new record. In this article's sample database, the navigation buttons put the text "*New" in the textbox when this condition exists. The following code demonstrates this:
You will notice that we add one to the value returned by the lngGetRecNo() function before displaying it. This is because the AbsolutePosition property is zero-based, meaning that the first record is numbered zero. Since Microsoft Access starts records at number 1, this addition ensures that our navigation buttons behave similar to the built-in ones. Spicing it UpNow that you have duplicated the built-in navigation buttons, you can add a little pizzazz by using another undocumented property called PercentPosition. Like the AbsolutePosition property, this property was introduced in Microsoft Jet version 2, but was not documented. PercentPosition returns a number between 0 and 100 showing the current record's position in the recordset expressed as a percentage. In other words, if you are half way through the records, PercentPosition returns a value of 50. With this property you can add a small progress meter to your navigation buttons that gives the user a sense of where they are within the recordset. The following code shows how to return the PercentPosition property:
This function works much like the previous one. The form's recordset is cloned using the RecordsetClone method and synchronized using the Bookmark property. The function then retrieves the recordset's PercentPosition property and returns it. As with the previous example, the On Error Resume Next is used to determine if the form is currently on a new record, and if so, the function returns a value of -1. In our example, we use the percent position property to display a status meter with the record number. This is done by changing the width property of a Label control, relative to the value of the PercentPosition property. To make sure everything displays properly, we add a label called lblNavProgress underneath the label that displays the record number. We also update the form's OnCurrent event code to resize the label:
You will notice how the width of the lblNavRecord label control is used as a basis for sizing the recNavProgress rectangle control.
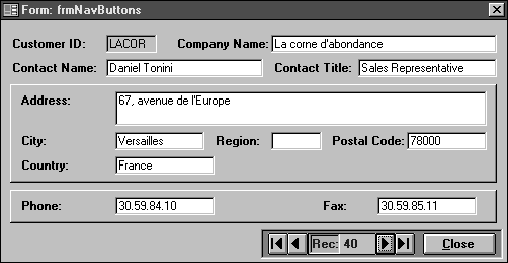
Figure 2 - Custom Navigation Buttons Some LimitationsNow that you are excited about your shiny new navigation buttons, I have to reveal this techniques limitations. The first, and most obvious problem is that this technique has no provision for displaying the total number of records. While it would be a fairly simple matter to determine the number of records in the form's underlying recordset, there is an inherent problem of performance. If the form is based on a large number of records, determining the number of records can be a fairly slow operation. Add to this the fact that every time a record is added or deleted, you have to re-determine the number of records and you can see why we have not implemented this functionality. It is interesting to note the way that Microsoft Access handles this on its own navigation buttons. When you first open a form, the number of records is not immediately displayed. Microsoft Access waits for idle time (that is, the time when you are not doing anything with your computer), and uses it to allow Microsoft Jet to move towards the end of the recordset. Using this behavior, Microsoft Access will eventually show you the number of records. Also, since Microsoft Access and Microsoft Jet are very tightly related, Microsoft Access can track record additions and deletions internally, and keep the number of records counter updated easily. The bottom line is that if your application absolutely needs to display an accurate record count, then this technique is not for you. If, on the other hand, having a visual indication of the user's progress through the recordset (in the form of our progress meter) is sufficient, then you are set. Another limitation is the fact that you cannot set your own navigation buttons to AutoRepeat. This means that when the user holds the button down, the navigation buttons will not continually move to records. This limitation is caused by a subtle flaw in the Microsoft Access event model for forms. In a nutshell, moving to a different record in an Access form causes the event model to "reset" its handling of the AutoRepeat property. Even though you can set the AutoRepeat property of your navigation buttons to true, it will have no effect: you cannot hold down the button and get anything to happen more than once. This is a problem in Access 2 that will hopefully be addressed in a future version. The final limitation is not really a limitation, but rather a friendly warning that you should not rely on the value returned by the AbsolutePosition property for anything other than display purposes. Since Microsoft Access endeavors to be a relational database, the concept of record numbers can be considered meaningless for developers. While record numbers are useful for displaying on a form, they cannot be used to uniquely identify a record, and as such, should not be use as the basis for data operations. To wrap up, you may want to add a final piece of functionality to your navigation buttons. You have probably seen that Microsoft Access allows you to move the cursor to the area of the built-in navigation buttons that displays the record number. Once there, you can type in a record number and press [Enter], causing the form to move to the requested number. You can mimic this functionality in your custom navigation buttons by placing a textbox where the user can type in a record number. In the AfterUpdate event of that textbox, you call the GotoRecord action with the A_GOTO constant and the value of the textbox. Back to Main Technical Papers Page
Copyright © 1998, FMS Inc. All rights reserved. This information may not be republished, reprinted or retransmitted in any form without the express written permission of FMS Inc. The information provided in this document is provided "as is" without warranty of any kind. |
|
|
Contact Us
l Web questions: Webmaster
l Copyright © FMS, Inc., Vienna, Virginia Celebrating Decades of Software Excellence |